
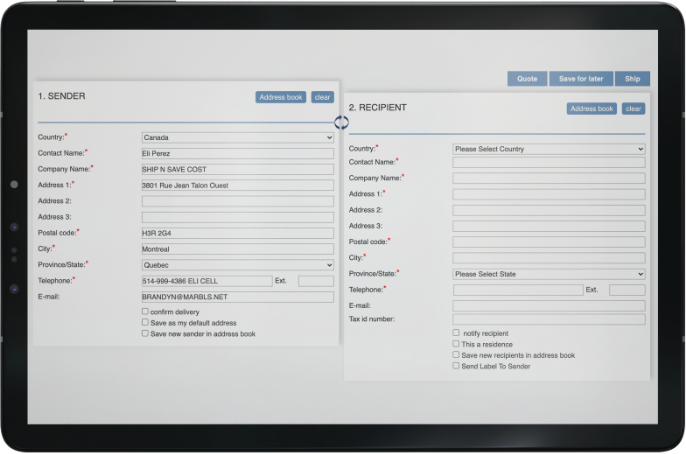
Step 1 - Create a shipment
Start by entering your sender and recipient information. You can either select from your address book or input the details for the first time and save them for future shipments. Next, fill in the shipment details. If you're shipping internationally, a commercial invoice section will appear, which you can complete at no extra cost. LNS Xpress simplifies the process, making it straightforward and hassle-free.
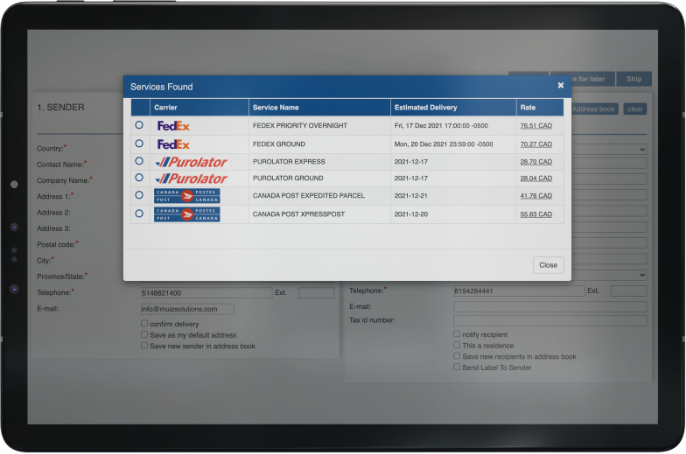
Step 2 - Picking the right service
After filling in the shipment details, click the quote button to view a list of carriers and services along with their pricing. Select the service that best meets your needs, with each option reflecting the discounted rate applied to your account.
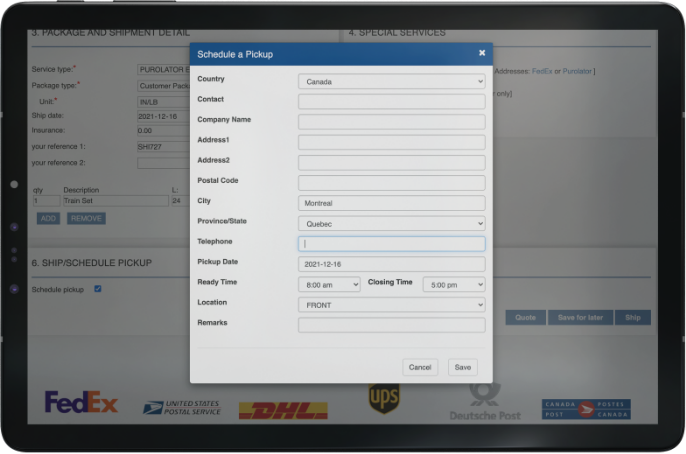
Step 3 - Scheduling a pickup
After selecting a service, scheduling a pickup is as simple as clicking a button. Just check the "Schedule Pickup" box, and a pop-up window will appear with the pickup details. Verify that the correct address and pickup time are shown, then click the "Save" button.
Step 4 - Print your label
LNS Xpress offers two options for printing your label: you can use a thermal printer (if available) or a standard printer with regular paper. If you're shipping internationally, a commercial invoice will also be provided for printing. Simply attach the label to the box or place it inside a waybill window pouch, and you're good to go.

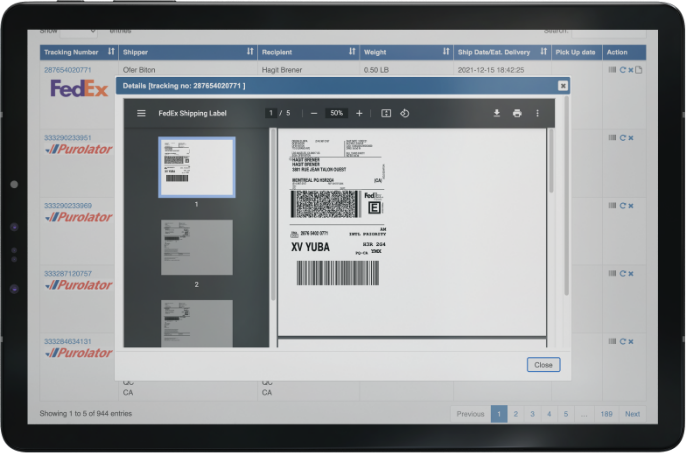
Step 5 - Tracking your shipments
LNS Xpress makes tracking your shipment simple. After logging into your account, navigate to your shipment log and click on the tracking number. A window will pop up displaying all your shipment information and tracking details, allowing you to easily see where your shipment is and when it will be delivered.